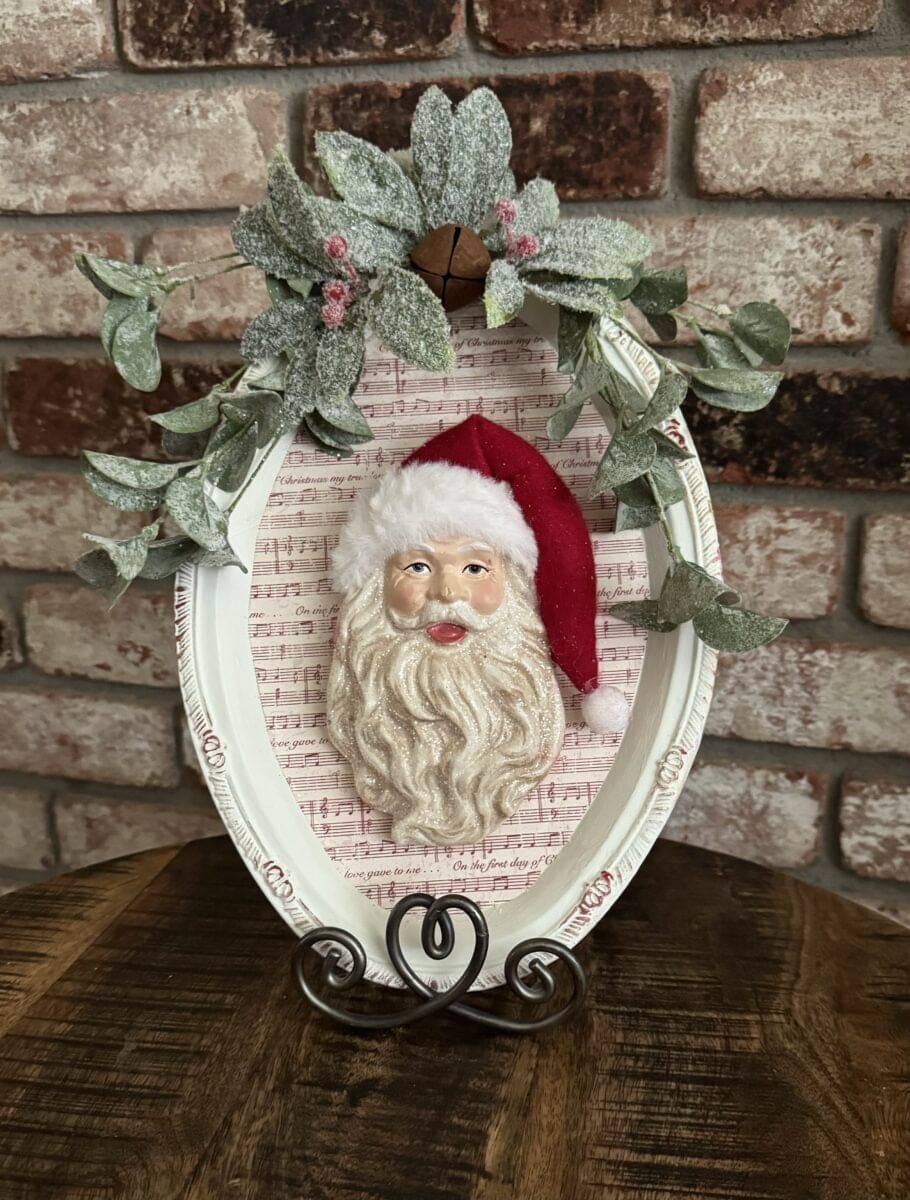
Santa Ornament Decor
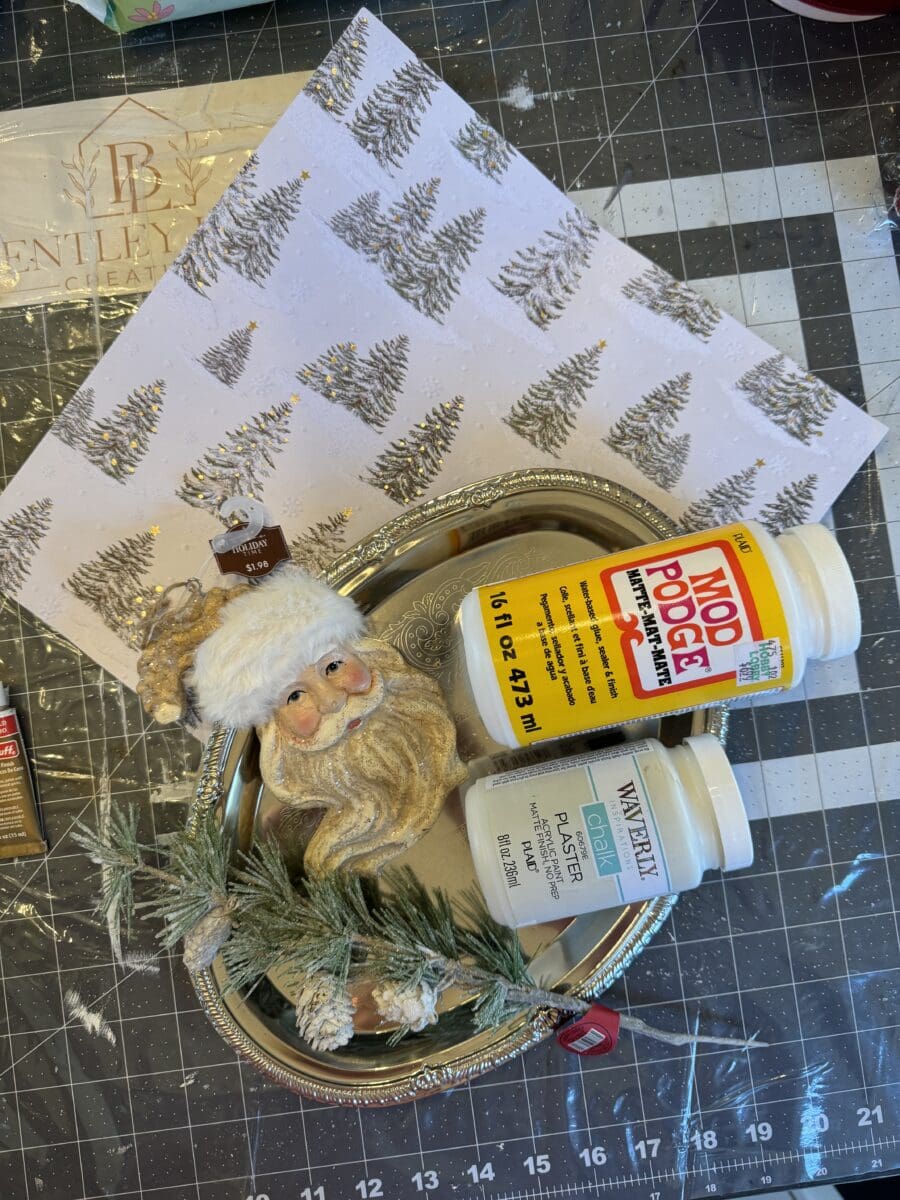
Here are the supplies I used:
- Silver Tray from Dollar Tree. You could also use a picture frame or even wood for this project.
- The Santa ornament. I purchased both the red and the gold Santa ornaments at WalMart for $1.98 each. They do sell these same ornaments at Hobby Lobby if you can’t find any at your local WalMart.
- Paint. I used the Waverly chalk paint in the color Plaster for this project.
- Mod Podge
- Scrapbook paper of your choice
- Rub n Buff or an accent colored paint of your choice
- Embelishments of your choice

Here is how I made it:
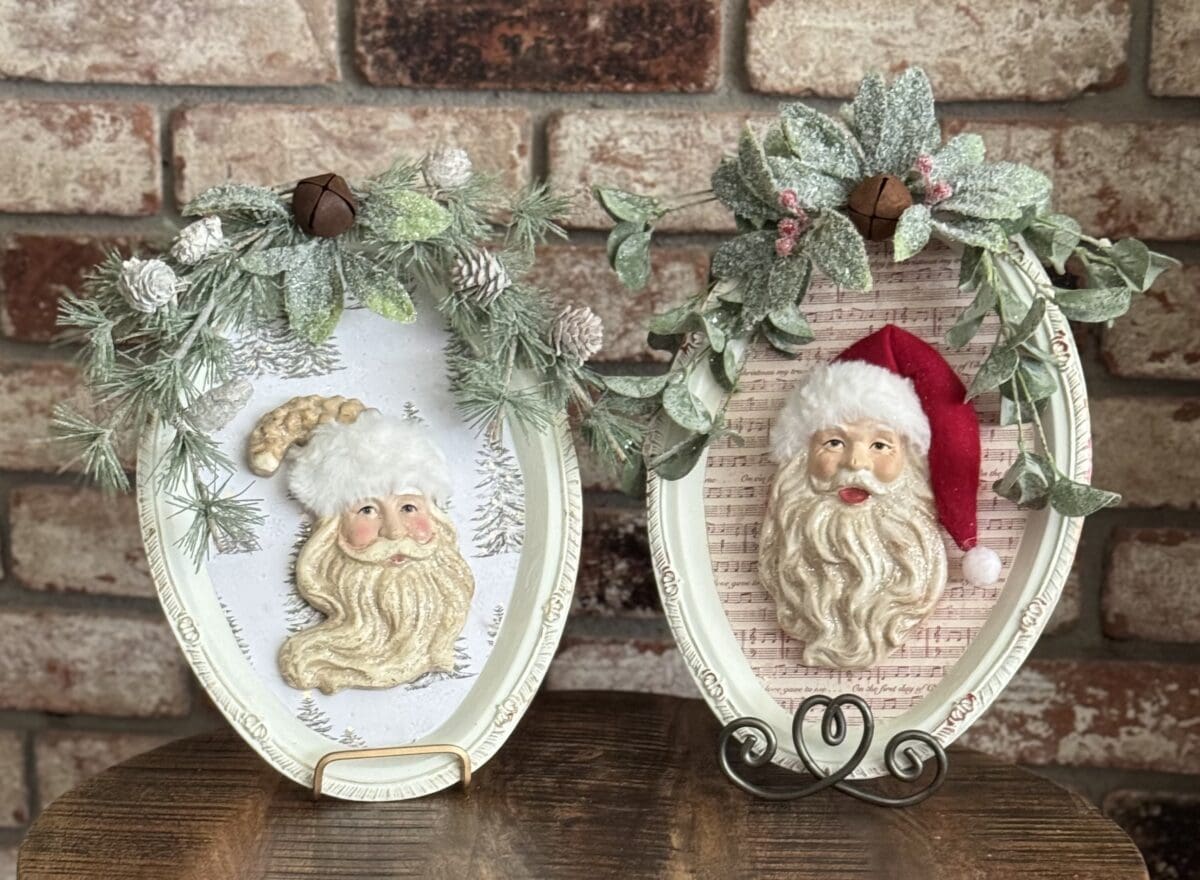
1. I first traced the paper along the oval part of the tray so that I could cut a piece to fit the inside of it. I didn’t worry too much about whether or not it would be perfect, as I had originally planned to use a border of some kind along the inside to hide any of those imperfections. In the end I decided against the border and left mine as is. It is good to note here that I made both Santa’s the same exact way, I just used different embelishments and accent colors.
2. Once my paper was cut, I sat it aside so that I could paint the tray with my chalk paint. This took two coats. I dried it inbetween the coats with my heat gun.
3. I used mod podge to coat the inside of the tray and placed the paper on top while it was still wet. I rubbed it all over until I felt it was on there smoothly and with no bubbles. I dried it a bit with my heat gun and put a coat of mod podge on top of the paper to give it a good seal.
4. After the mod podge completely cured, I hot glued my santa to the middle (left to right) of the tray, but wanted him more towards the bottom portion in order to add embelishments to the top.
5. I had some greenery in my stash so I pulled out a bunch and just kept playing with different pieces until I felt good about how they looked. I opted for a rusty bell on both instead of a traditional bow.
6. Lastly I used some red acrylic paint on my finger to lightly touch on the raised spot around the frame (for the red santa) and antique rub n buff to go around the frame for the gold santa.
I LOVE how these turned out and hope you love them too! Which one is your favorite?
Related Articles
Dollar Tree Bunny Heads
Creating the cutest little bunnies from these Dollar Tree bunny heads....I had these bunny heads from Dollar Tree in my stash, but not to worry, I have been to Dollar Tree and they have them again this year. I am a sucker for anything bunnies and knew I could use...
LOVE Sweatshirt DIY
Creating the cutest sweatshirts for Valentine's...I originally ran into Hobby Lobby to peek the big 90% off Christmas sale and ran into these cute little words! These words were in the Valentine's section of my store and 40% off. I wanted the XOXO but there was only...
Fall Table Chargers
Here is what you will need: Silicon Mold of choice, I found these on Amazon, but you can generally find these anywhere that cake decorating is sold as these are meant to be used with fondant for cake decorating. Air dry clay, I used DAS which is sold at Hobby Lobby. ...

