
Craft Room Bliss
Creating Your Perfect Workspace
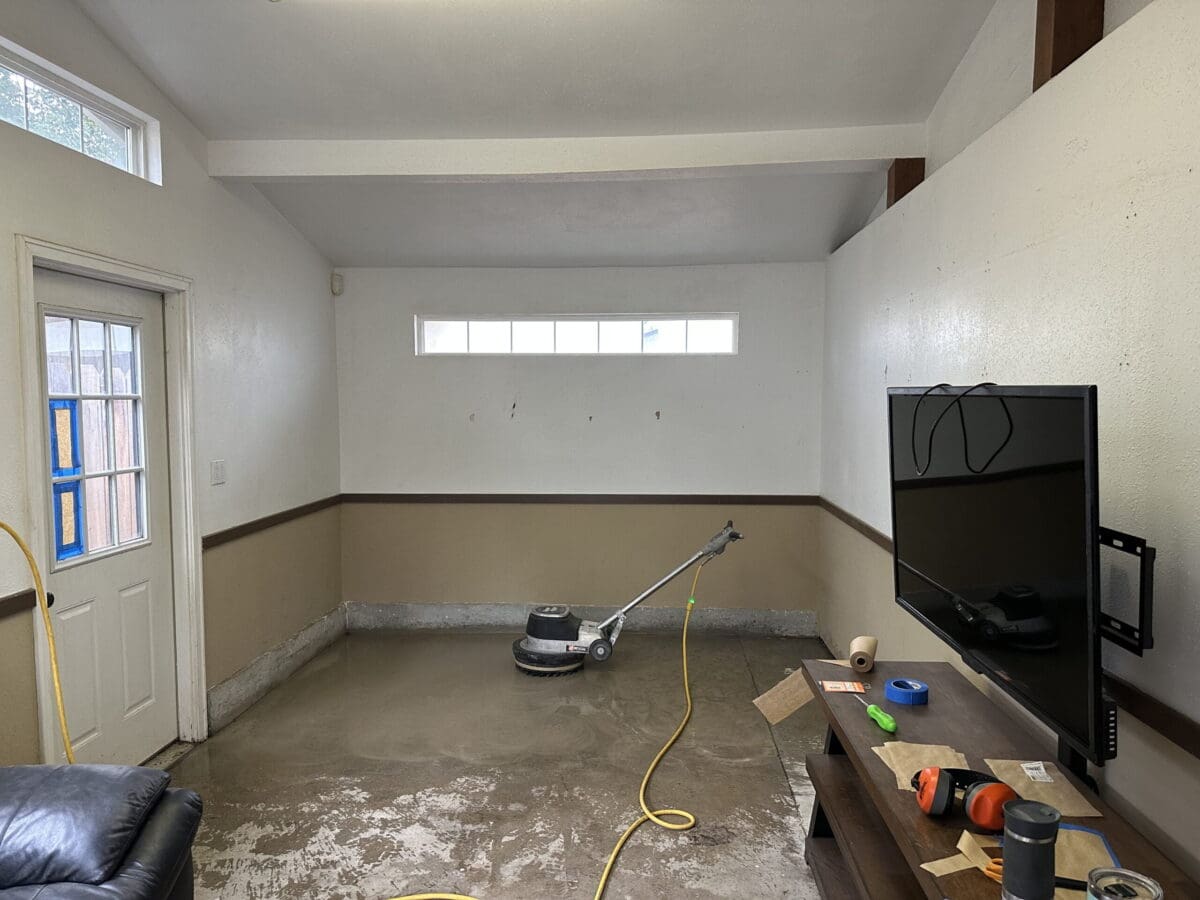
I did it! I finally have my very own studio and we (my husband and I) did it ourselves. I have always dreamed of having my own space for all things crafting but never had the room. There were kids taking up the bedrooms, bikes and cars and miscellaneous toys taking up the garage. So, I took to the kitchen table or a folding table somewhere in the house to build, paint or sew the next project. I always had tubs of supplies stacked in the garage or up in the attic space that I would have to find and go through to see what I had. Although doable, not ideal. When we finally became empty nesters and had the extra rooms, we moved! Our new home has two less bedrooms and we have two new grandchildren. I made one room for the grandchildren that doubles as a guest bedroom and our other free bedroom became an office for my husband’s full-time job which became work from home permanently this past year. Here I was again in the home with no space to call my own. We did however have a shop on the property and a room off of the shop that we had set up as our home gym/game room. One day my husband reminded me that I craft and create more than I work out, Ha! Thus the adventure began!
Here is how I got started!
For craft enthusiasts, having a dedicated space to indulge in creativity is a dream come true. A craft room workspace offers a haven where you can let your imagination run wild and bring your artistic visions to life. Whether you’re a seasoned crafter or just starting out, setting up a well-organized and inspiring craft room will enhance your crafting experience. In this blog post I’ll talk about my adventures of setting up my very own space and how you might be able to set up yours.
- Choosing the Right Space: Select a room or area in your home that can be transformed into your craft room. Consider factors like natural light, available square footage, and proximity to power outlets. Aim for a space that offers ample room to work comfortably and store your crafting supplies. Obviously for me, I knew I was taking over the workout room and I wanted to make sure I did it right the first time. I measured and drew out my plans on paper. Made a ton of inspiration boards and kept re-designing until I found the set up that would fit my space. Can you believe what it looked like before? Crazy right!

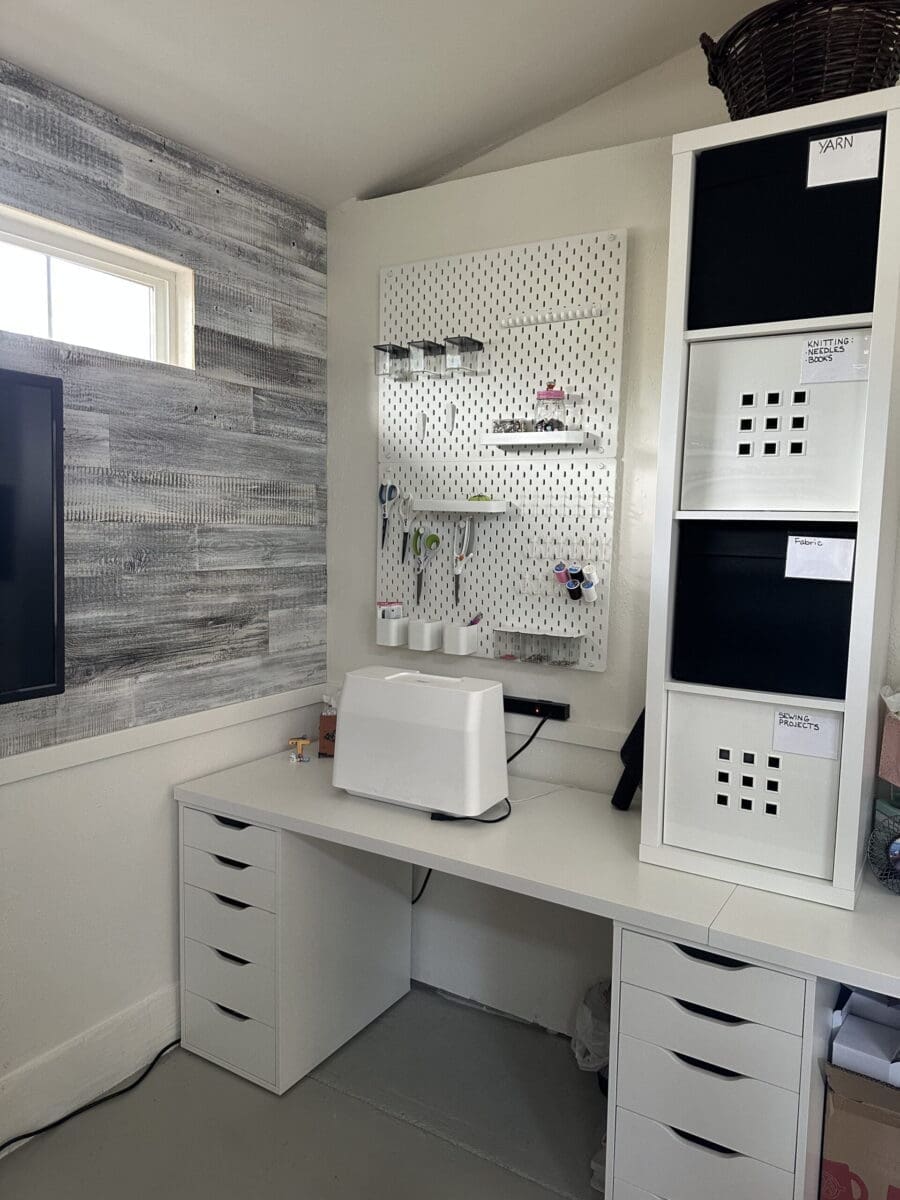
- Evaluating My Storage Needs: Crafting often involves numerous supplies, tools, and materials. Assess your storage requirements to ensure you have enough space for everything. Consider installing shelving units, cabinets, or bookcases to keep your supplies organized and easily accessible. Utilize storage containers, bins, and jars to categorize and store smaller items. I knew I wanted to have a place for everything, yet wanted it to be pretty and most importantly organized. I have a combination of drawers, bins, shelving and containers. I actually drew up three different designs to scale based on furniture and things I had found on IKEA. We took all three designs with us and talked through them in person at the store so we could decide on the perfect set up for the space. I did not take this task lightly. I wanted it to be perfect yet affordable. I felt IKEA was our best option since they have so many versatile designs and at affordable prices.
- Optimize Workspace: Prioritize a functional and ergonomic workspace. Invest in a sturdy table or desk that provides enough surface area for your projects. Consider the height of the table and your seating arrangement to ensure comfort and proper posture. If possible, choose a table with built-in storage compartments or drawers to keep frequently used tools within reach. I love everything about the storage units I chose. I am able to adjust how I use them and what I store in them as time goes on. We got the entire set up at IKEA, including all of the black and white bins that slide into the squares. I did purchase the tool chest from Home Depot which I am in love with.
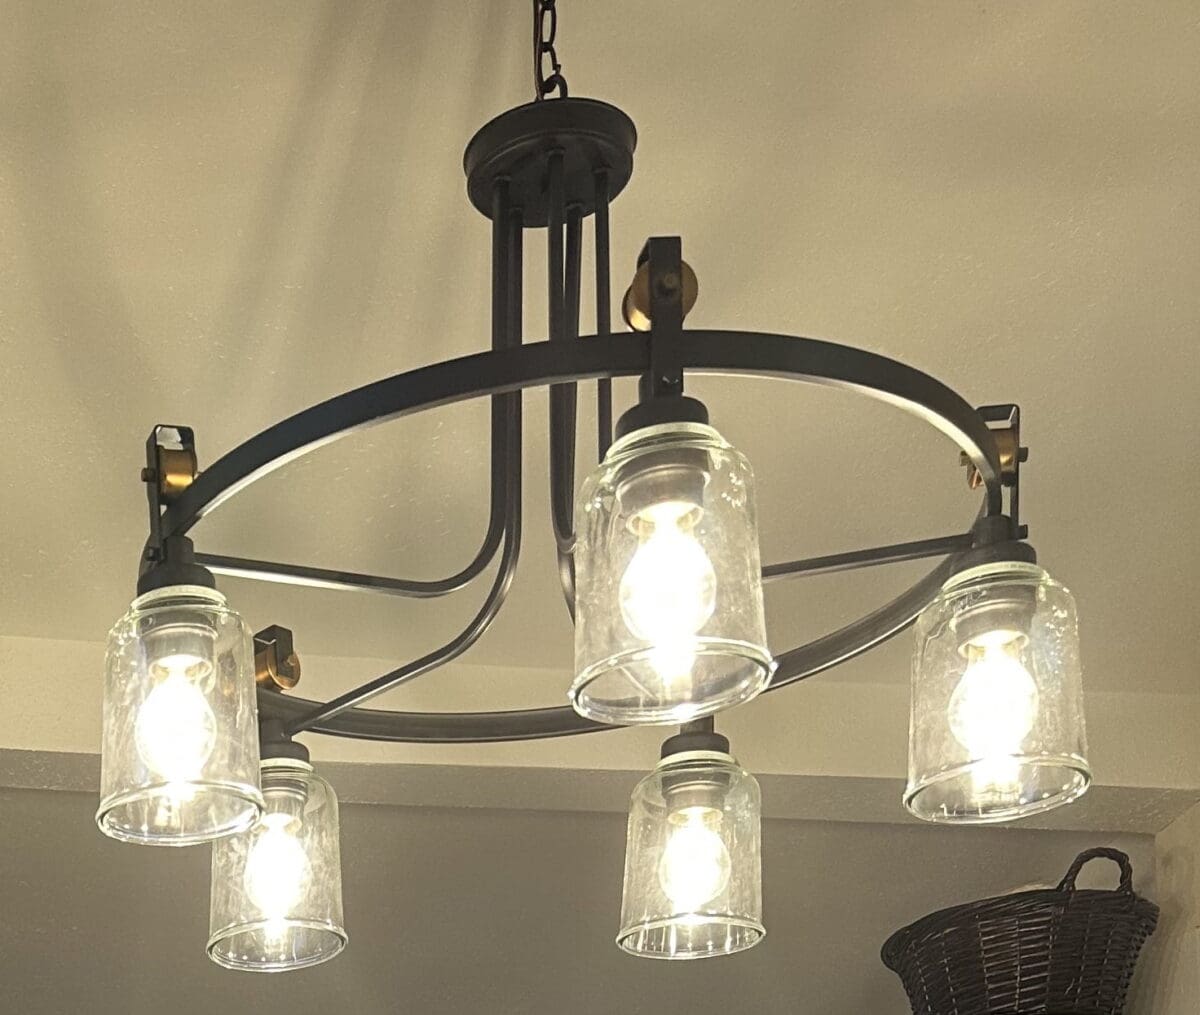
- Enhance Lighting: Ample lighting is crucial for detailed craftwork. Make the most of natural light by positioning your workspace near windows. Supplement natural light with task lighting options such as adjustable desk lamps or track lighting to eliminate shadows and provide focused illumination. I have a lot of windows in my space but I still wanted to make sure on gloomy days or when it’s dark outside I would have plenty of light. I opted for one big chandelier type light with big bulbls and I have lights to be installed at each workspace as well so that I have plenty of light no matter time of day or year. Stay tuned to see the workspace lighting, I’ll do a post once it’s all installed.

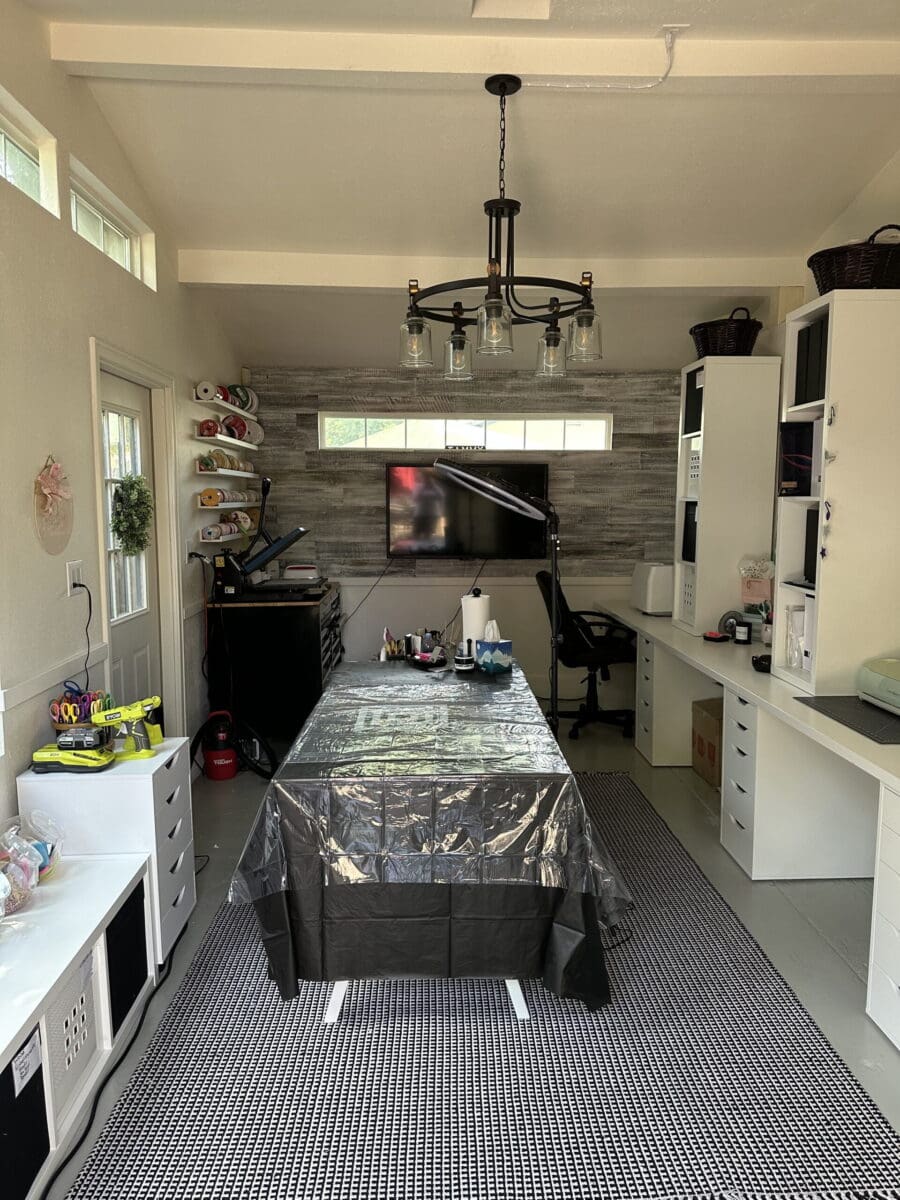
- Inspire Creativity with Decor: Infuse your craft room with a creative ambiance that sparks inspiration. Decorate the walls with colorful artwork, motivational quotes, or a bulletin board for pinning ideas and inspiration. Display completed craft projects or collections to celebrate your accomplishments and create a visually stimulating environment. I am still in the process of decorating my space. We put the wood planks on my back wall and installed a large tv. I have a few things to hang and have quite a stack of things that I am excited to create just for my space.
- Create an Organizational System: Establish an efficient organizational system that suits your workflow. Categorize your supplies and tools based on their type, frequency of use, or project type. Utilize storage solutions like labeled bins, clear containers, or hanging organizers to keep everything in its rightful place. Designate specific areas for different crafting disciplines to streamline your creative process. I set my space up so that all of my things have their own place. I continue to move things around and change it up as I go for efficiency. I feel like this is probably something that will take a while to get dialed in.
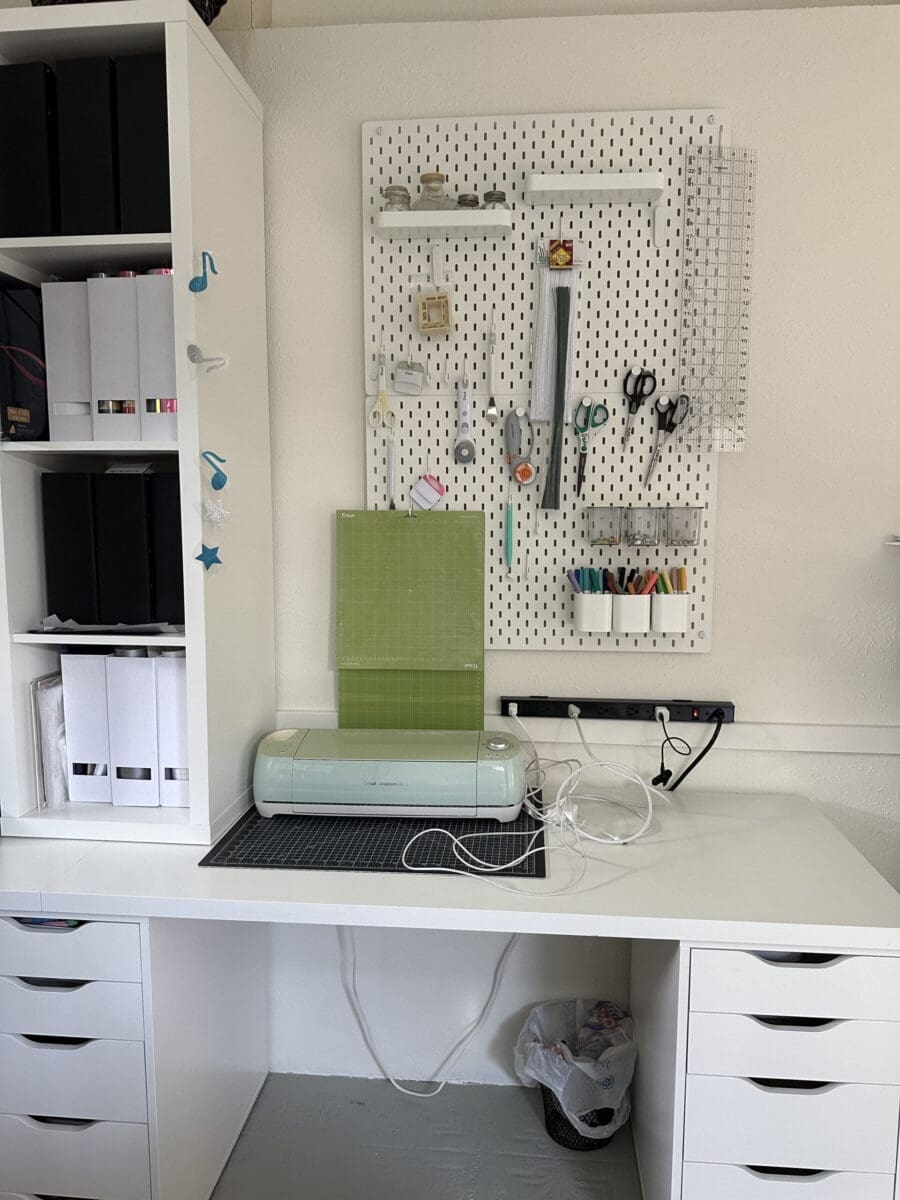
- Consider Workstation Zones: If you engage in multiple crafting disciplines, consider setting up separate zones within your craft room. Dedicate areas for sewing, painting, paper crafting, or any other crafts you enjoy. This helps create distinct workstations tailored to each activity and prevents clutter and confusion. I set up a sewing station, a design station, a Cricut station, a sublimation station, printing station and my craft island for crafting. I found that when my Cricut or sewing machine were put away I didn’t use them as much because I hated having to get them out and set them up. Because I had the space, this was a priority for setting up this room. I opted for bins next to my sewing station so that I could store fabrics and yarns and such and opted for magazine holders at my cricut station so that I could house my vinyl and keep it organized by colors, textures and types. I also used bins on the other side of my room under the window for embelishments and things. Of course my ribbon has its own shelving now which has been my favorite part so far. Hopefully this will eliviate me buying the same things over and over because I forget I already have it or can’t find it!

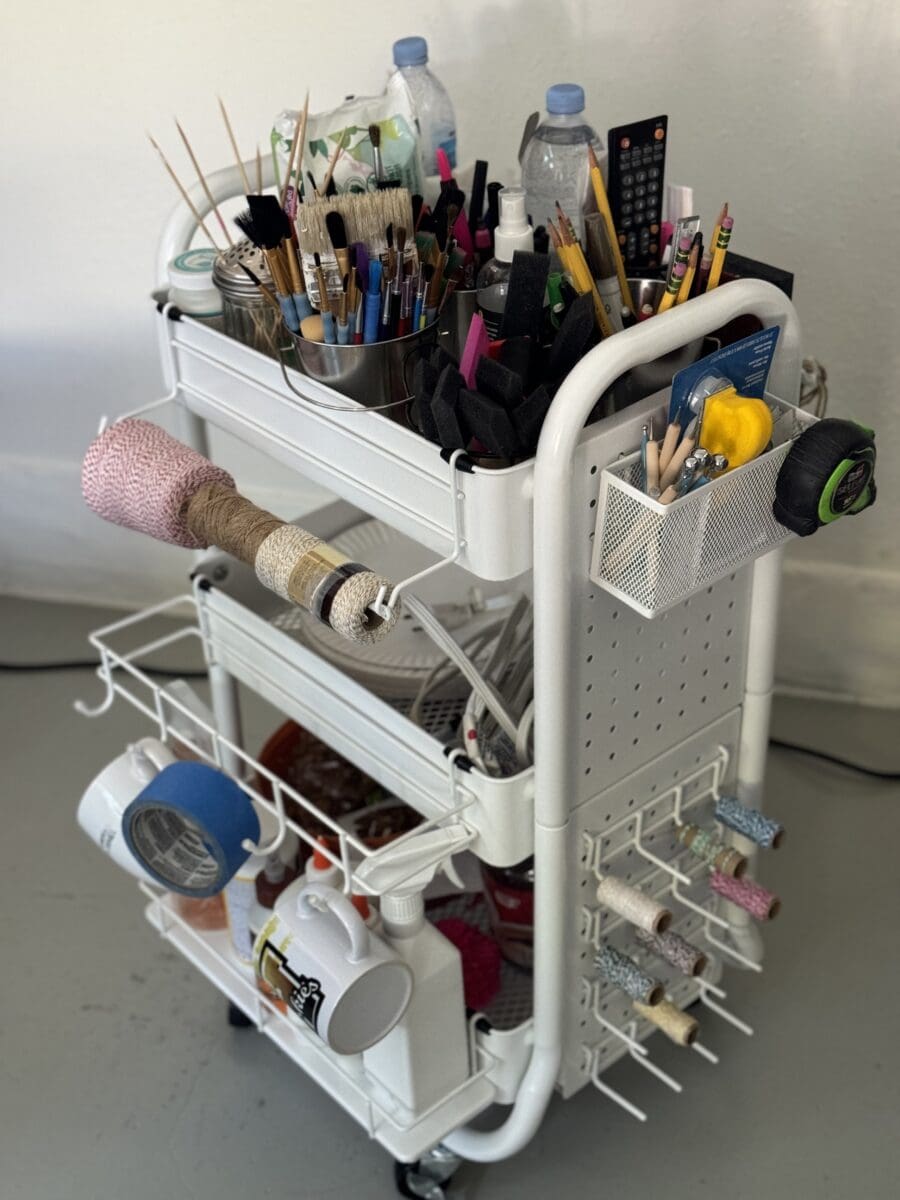
- Ensure Easy Access to Tools and Supplies: Arrange your most commonly used tools and supplies within arm’s reach of your workspace. Keep frequently used items such as scissors, adhesive, rulers, and pens in a desk organizer or caddy for quick access. Utilize pegboards, hooks, or wall-mounted organizers to hang frequently used tools, ensuring they are visible and easily retrievable. I hung the peg boards above my sewing and cricut stations. I bought a craft cart on wheels at Michael’s that I can wheel around with all of my most used items. I was able to pick up little buckets at the Dollar Tree for my paint brushes, pens, pencils and things like that.
- Incorporate Comfort and Personalization: Make your craft room a comfortable and inviting space by adding personal touches. Include a cozy chair or seating area where you can take breaks and brainstorm ideas. Consider incorporating a small side table or cart for refreshments or a dedicated space for inspiration boards and sketchbooks. The middle desk between my sewing and cricut spaces is just that. I have a glass board that hangs with personal notes, photographs, artwork from my grandbabies and on the desk itself is where I sit and design my projects, take my zoom meetings and where I light a candle to write my blogs.
- Maintain a Clean and Organized Space: Regularly declutter and clean your craft room to maintain an organized and productive workspace. Return supplies to their designated spots after each project, and establish a habit of tidying up at the end of each crafting session. This is easier said than done sometimes but boy does it feel good to come back to a clean space.
Designing and setting up your craft room workspace is an exciting and rewarding process that allows you to create an environment tailored just for you, by you. My room is still a work in progress. I am currently waiting on a piece of glass for my center table so that I can discard the temporary tablecloth and I still need to install the side lighting and unbox some of my things, but this space brings me so much joy. Whether you are crafting from the garage, a spare bedroom in your home, or your very own dedicated space, make it a space that brings you joy. Happy crafting!
Related Articles

LOVE Sweatshirt DIY
Creating the cutest sweatshirts for Valentine's...I originally ran into Hobby Lobby to peek the big 90% off Christmas sale and ran into these cute little words! These words were in the Valentine's section of my store and 40% off. I wanted the XOXO but there was only...

Santa Ornament Decor
Here are the supplies I used: Silver Tray from Dollar Tree. You could also use a picture frame or even wood for this project. The Santa ornament. I purchased both the red and the gold Santa ornaments at WalMart for $1.98 each.
Fall Table Chargers
Here is what you will need: Silicon Mold of choice, I found these on Amazon, but you can generally find these anywhere that cake decorating is sold as these are meant to be used with fondant for cake decorating. Air dry clay, I used DAS which is sold at Hobby Lobby. ...